I recently attended a ladies retreat hosted by my church. The weekend's teachings were based on Ann Voskamp's book, One Thousand Gifts. Her book talks about listing all the big, and more importantly, small things that happen over the course of the day that remind us of God's love. She encourages everyone to keep a journal of these gifts.
As a craft, we created an altered journal to keep a list of our gifts. I have made these in the past when I used to paper scrapbook. I really enjoy the creative process of it and it's actually easy to create one.
Step 1: Gather your supplies
- A composition book
- Scrapbooking paper (mine was a package of 50-12x12 pieces) - 4 coordinating pieces
- Letter stickers
- A straight cutter
- Ruler (optional)
- Scissors
- Modge-Podge or watered down white glue
- Paintbrush
- Any other decorative items you want to use
Step 2: Cut paper for the front cover
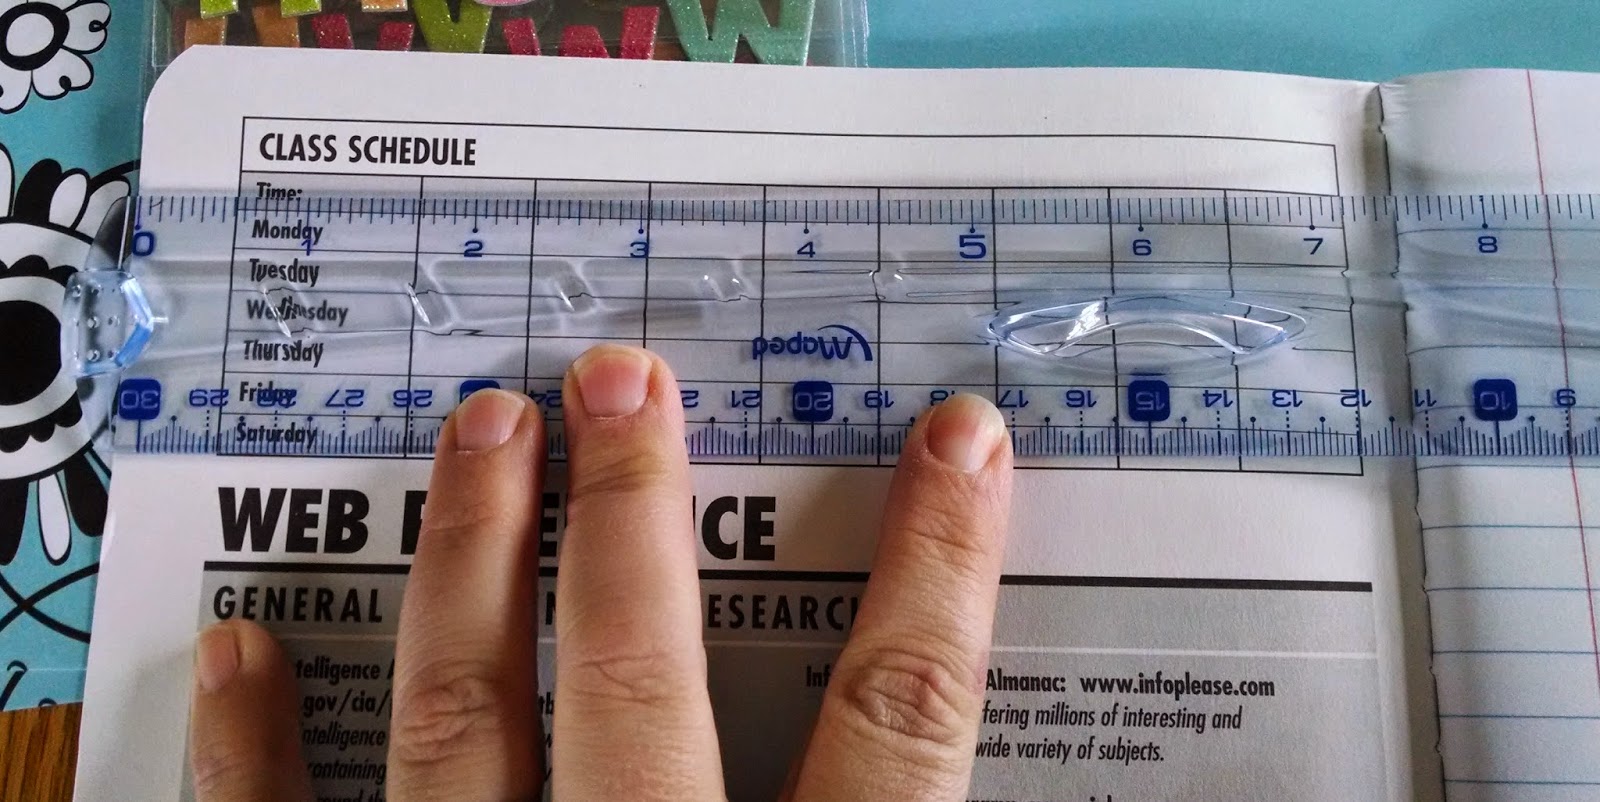
I like to leave the black tape uncovered on the binding of the composition book. I measure from the tape to the edge of the book which is about seven inches. Cut the piece of paper you want for the front cover (just worry about the width and not the length).
Step 3: Glue it down
Using the Modge-Podge or watered down white glue glue the cover paper on. If you have a design on it, make sure you have it centered the way you want. Be sure to leave some paper hanging over the top and bottom edge of the cover.
Fold the top edges over and glue those down to the inside of the book.
Step 4: Cut inside paper
Measure the inside cover of the book. This will be longer since you don't have the black tape to compensate for. You'll want to be a bit more accurate with length and width this time so fits better.
Cut a coordinating piece of paper to cover the entire inside cover. Use the modge-podge to glue it down. Be careful of any excess glue as it will stick to the paper. I keep a paper towel handy to clean up as needed.
Step 5: Cover the back cover
Repeat Steps 2-4 to cover the back cover as well. If you want to add any type of closure to your book or bookmark, now it a good time to do this.
For a book mark, take a length of ribbon and glue it near the top back cover before you glue the inside cover paper. Make sure to measure it longer than the book so it hangs out of the bottom of the book making it easier to find.
Similarly, for a closure, glue a length of string, yarn, or ribbon near the edge of the middle of the back cover before gluing the inside cover paper in place. You can then add a large button or brad to the front cover to tie it around.
Step 6: Decorate the cover
I used some washi tape to cover the rough edges of the sides. You could also cut a two inch piece of coordinating paper and glue it to the edge as well.
I also added some sparkle with stickers spelling out "Blessing." The sky is the limit to how you can decorate one.
Add a pen and you have a relatively inexpensive gift for any occasion. I had many of the items on hand due to my rather, ahem, large scrapbooking stash. However, even if you were to purchase all the supplies, this should end up being about $8 for one. If you have a Dollar Tree store near you, you can find many of the items there making it a bit more inexpensive.


No comments:
Post a Comment
We welcome responses and questions.